Sunday, October 30, 2011

Mummy Cupcakes


I haven't done many fun baking projects lately and it had been a while since I had whipped together some buttercream and played with fondant. So, I became a bit inspired over the pre-Halloween weekend.  Last year, I made ghost cupcakes for a friend's halloween party. This year, I thought I'd try these mummy cupcakes.

 I made white chocolate fondant again. While it was pretty simple to knead it together and roll it out, the time intensive part was in cutting all the "bandage" strips and making the mummy faces. 


I made devil's food chocolate cupcakes, vanilla buttercream for the base, some candy eyes and then all the cute little white chocolate bandage strips to make the mummy faces.


They don't look very scary at all, but they're fun to unravel and eat.

Saturday, October 15, 2011

Lime Mascarpone Panna Cotta with Raspberry Sauce


This is my kind of jello. I have never much cared for actual Jell-O growing up and have always preferred more creamy gelatin desserts like this panna cotta. I was locked up inside one weekend this past summer when we had a hurricane rolling through, so I decided to make an amazing dinner for Miss A and I along with this yummy dessert. 

The recipe called for pouring it into small champagne glasses. But, I much prefer the look of the panna cotta displayed on its own outside of the confines of a glass. I've had all kinds of little stainless steel molds, so I tried a few different ones.  The one that worked the best is the small brioche mold.


I love mascarpone cheese. It just looks so velvety.


This was the mascarpone-gelatin mixture with some grated lime peel.


I filled up the molds and ended up having to use one glass. Then, they chilled for the afternoon while we watched the storm brew outside.


My final product all speckled with grated lime peel.

I made the warm raspberry sauce to pour over the panna cotta and it was a perfect combination of cold and warm on a stormy day.


Recipe for Lime Mascarpone Panna Cotta with Raspberry Sauce
From Bon Appétit

Ingredients:
6 T. fresh lime juice, divided
1 1/2 t. grated lime peel
1 t. unflavored gelatin
1 1/4 cups whipping cream, divided
1/2 cup mascarpone cheese or cream cheese
3/4 cup sugar, divided
1 T. butter
1 1/2 6-ounce containers raspberries (about 2 cups)
1 lime

Directions:
Combine 1/4 cup juice and peel in small saucepan; sprinkle gelatin over. Let stand 5 minutes. Add 1/4 cup cream to gelatin mixture; stir over low heat just until gelatin dissolves. Remove from heat.
Whisk mascarpone and 1/2 cup sugar in medium bowl; gradually whisk in remaining 1 cup cream until smooth. Whisk gelatin mixture into cream mixture. Pour into 6 widemouthed Champagne glasses, small wineglasses or small molds. Chill until set, at least 4 hours or overnight. If you used tin molds, run the outside under warm water (but not hot) and turn them out on the plate.

Sauce:
Stir remaining 2 tablespoons lime juice, 1/4 cup sugar, and butter in large skillet over medium-high heat until sugar dissolves, about 3 minutes. Cool 2 minutes. Fold in berries; spoon over desserts. Grate peel from 1 lime directly over desserts.

Saturday, August 27, 2011

Cherry, Coconut and Pecan Granola


I enjoy following the Tartelette blog and she shared this granola recipe several months ago.  Since then, I haven't made any other kind of granola and I certainly do not buy it in the store any longer.  It includes some of my favorite things - coconut, dried cherries and pecans.  I enjoy having it with plain or vanilla yogurt and fresh fruit on top.  Little Miss A enjoys eating it just like cereal with milk. Either way, it's delicious.


The mixture you cook to make it all stick together smells SO yummy when you're cooking it.  It includes maple syrup and reminds me of the times with my family making maple syrup growing up.


You mix in the warm maple syrup and sugar mixture with the oat mixture and let it bake.


I always stir it several times while it's baking to make sure it's all cooked and dry. I prefer not to have the granola sticky and chewy.  Then, you add in the dried cherries.

Saturday, July 30, 2011

Strawberry Creamsicles

I didn't do a lot of baking over the summer with it being so hot out. So, these popsicles were fun to make in the heat and definitely enjoyed.  My sister sent me this great ice pop book for my birthday and I decided to put it to use.

I like these classic popsicle molds and she sent me the molds to make them too.


They were very easy to make with blending the strawberry mixture and using vanilla yogurt to alternate in the mold and create the yummy strawberry creamsicle.

Monday, July 11, 2011

Coconut Cake with Lime Curd


This is the second year that I've made my own birthday cake. And, for those that really know me (and how 'type A' I truly am), you know that I refuse to do anything the easy way and have to make it completely from scratch. Last year, that meant that I made my own white chocolate fondant. This year, that required the use of my toolbox to get all this lovely coconut you see. I think it was worth it though...and pretty fun.

Dad would be SO proud that I finally put these tools to use...


After boring a hole to get the water out for the cake batter, I finally cracked it open.  Luckily I was alone and had the blinds closed, as I'm sure I looked like a crazy woman laying the hammer to this coconut.


The cake was made with the coconut water instead of just milk and then I made fresh lime curd for the filling. You know that song...."you put the lime in the coconut...." I just LOVE coconut and basically anything with it - coffee, desserts, drinks...


I had some help from a friend to grate all the coconut. I think she thought I was out of my mind since you can buy it already shredded up in bags in the store.


A lot of grating later, we put coconut in between the layers.


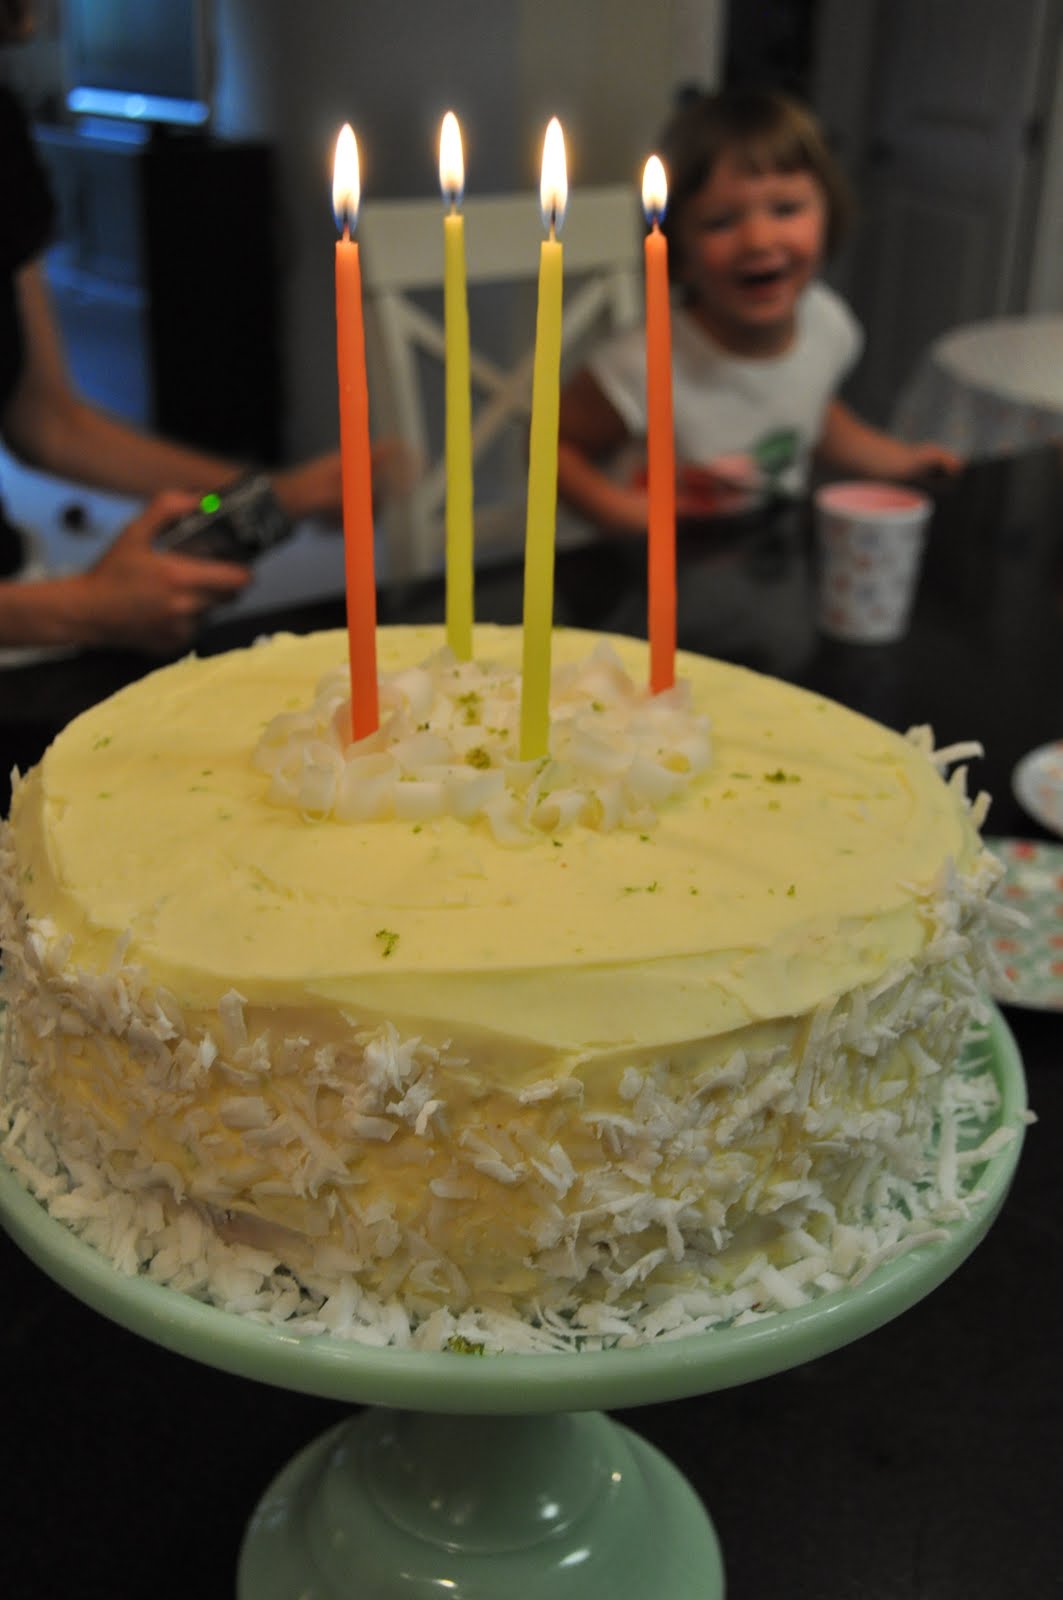
I made a lime buttercream with fresh lime juice and zest.  I love all those fresh green specs of lime mixed in the frosting. 


More coconut and grated lime zest on top and my cake was complete!


Little A had a blast.  What little girl wouldn't when you have a huge cake displayed on a platter when you wake up from your nap?  Before my friend and I went out to celebrate, we had a a little birthday celebration with her and enjoyed some of the cake.


After we licked the frosting off the candles, she was so excited to cut the cake. And being quite the sophisticated toddler that she is, she enjoyed my coconut and lime curd cake. 

If you think you have the tools and patience to tackle this one, the recipe is below.  I dare you and bet you'll enjoy it too.  Make sure you have lots of friends to help you eat it though.  I ended up having three separate birthday celebrations to finish this cake off.


Recipe for Coconut Cake with Lime Curd
Adapted from a recipe printed in Gourmet Magazine

Ingredients:

Cake:
3 C. cake flour (not self-rising)
1 T. baking powder
1 t. salt
1 C. whole milk
1/2 C. fresh coconut water (from about 3 small or one large coconut)
1 1/2 t. pure vanilla
2 1/2 sticks (1 1/4 C.) unsalted butter, softened
1 3/4 C. sugar
5 large eggs

Lime Curd:
6 large 
3/4 C. sugar
1/2 C. fresh lime juice
3 T. heavy cream
3/4 stick (6 T.) cold unsalted butter, cut into pieces
2 t. freshly grated lime zest

2-4 C. shredded coconut (depending on how much you want to decorate with)

Frosting:
3 sticks (1 1/2 C.) unsalted butter, room temperature
1 lb. (4 C.) powdered sugar
1/2 t. pure vanilla


Directions:
Preheat oven to 350°F. Line bottoms of two buttered 9- by 2-inch round cake pans with rounds of wax paper or parchment paper and butter paper. Dust pans with flour and tap out the excess.

Make cake layers:
In a bowl, whisk together flour, baking powder, and salt. In a glass measuring cup stir together milk, coconut water, and vanilla. In a large bowl with an electric mixer, beat butter on medium speed one minute and add sugar in a slow stream, beating. Beat mixture scraping bowl occasionally, until light and fluffy, about 2 minutes. Beat in eggs one at a time, beating well after each addition. Reduce speed to low and beat in flour mixture in four batches alternately with milk mixture, beginning and ending with flour mixture and scraping bowl occasionally, until batter is just combined (do not overbeat).
Divide batter among pans, smoothing tops and tapping pans on counter to allow any air bubbles to escape. Bake cake layers in middle and lower thirds of oven (arrange pans so they overlap only slightly) until a tester inserted in center comes out clean, about 30 minutes. Run a thin knife around edges of pans and invert cake layers onto racks. Remove wax paper carefully and cool cake layers completely. Cake layers may be made 1 day ahead and kept, wrapped in plastic wrap, in an airtight container in a cool dry place. (Alternatively, cake layers may be made 5 days ahead and frozen wrapped in plastic wrap and foil. Thaw cake layers in refrigerator 1 day before proceeding.)

Make lime curd:
In a heavy saucepan whisk together yolks, sugar, lime juice, cream, and butter and cook over moderately low heat, whisking constantly, 5 to 7 minutes, or until mixture just reaches a boil (do not continue to boil). Strain curd through a fine sieve into a bowl and stir in zest. Cool curd its surface covered with plastic wrap, and chill at least 4 hours and up to 2 days.

Assemble cake layers and lime curd:
Put 1 cake layer on a cake plate and spread evenly with about half of lime curd. Sprinkle with 1/2-1 cup shredded fresh or sweetened flaked coconut and chill 15 minutes. Chill cake 15 minutes.

Make frosting:
With an electric mixer, beat butter on medium-high speed until pale and creamy, about two minutes. Reduce speed to medium and add powdered sugar 1/2 cup at a time.  Beat well after each addition and scrape sides of bowl as needed. Add vanilla and beat until frosting is smooth. Frosting can be stored in an air tight container in the refrigerator for up to 10 days.  Frosting should be brought to room temperature and beat on low speed until smooth again, about five minutes.

Frost cake and coat with fresh shaved coconut.

To extract coconut liquid:
Pierce softest eye of each coconut with a metal skewer or small screwdriver (I found it worked best to hammer a small screwdriver into the coconut or use a drill) and working over a bowl shake coconut, draining liquid and reserving coconut for shredding or shaving (procedure follows). Makes about a scant 3/4 cup liquid.

To shred or shave fresh coconut:
Preheat oven to 400°F.
Bake reserved drained coconuts in oven 15 minutes
With a hammer or back of a heavy cleaver, break shells and remove meat, levering it out carefully with point of a strong knife or small screwdriver. Remove brown membrane with a sharp paring knife or vegetable peeler.

To shred coconut:
In a food processor fitted with fine shredding blade shred coconut meat from about 1 coconut in batches or shred by hand on fine shredding side (small tear-shaped holes) of a 4 sided grater until you have about 1 cup, reserving remaining coconut meat for another use.

To shave coconut:
With a vegetable peeler shave edges of coconut meat pieces until you have about 3 1/2 cups, reserving remaining coconut meat for another use. Coconuts may be shredded or shaved 1 day ahead and chilled in a sealable plastic bag.

Wednesday, July 6, 2011

Blackberry and Goat Cheese Bars


I love seeing all the fresh berries at the market each weekend and have enjoyed baking with blackberries lately, including the peach and blackberry tart I recently made. I could just sit and eat a whole bowl of berries or, better yet, cover them in custard and eat them.

These bars consisted of a shortbread crust, a layer of blackberry jam, and then the fresh berries drenched in a custard made with cream cheese and goat cheese.  I think they're supposed to be for dessert, but they were breakfast for my team meeting one morning. They weren't complaining.

Blackberries are so pretty. Last year, I made little meringue shells for them.


And, then the downpouring of custard.  And, not just any custard, but custard with goat cheese, fresh lemon juice and fresh lemon zest.


They're so good together.


The finished product...for dessert or breakfast.


Recipe for Blackberry and Goat Cheese Bars
Adapted from a recipe by Scott Peacock in BHG

Ingredients
 
1C. unsalted butter (2 sticks) cut into 1-inch chunks
1/4 C. packed light brown sugar 
1/2 t. salt
2 C. unbleached all-purpose flour
Softened butter (for brushing sides of foil)
1 C. blackberry jam or preserves
1 pint (2 cups) fresh blackberries
1/2 - 8-oz. pkg. cream cheese, softened
4 oz. goat cheese
1/2 C. granulated sugar
1 T. unbleached all-purpose flour
1 large egg
1 large egg yolk
2 T. finely shredded lemon zest
2 T. freshly squeezed lemon juice
1/2 t. pure vanilla
 
Directions
 
Preheat oven to 350 degrees F. Line a 13x9x2-inch baking pan with a 24-inch-long sheet of aluminum foil, leaving extra foil extending over ends (use these later to lift bars from pan); set aside. In a large bowl beat the butter with an electric mixer on medium to high speed until it just begins to blend and soften slightly, about 30 seconds. Add brown sugar and salt, beat on low speed until incorporated, 30 seconds to 1 minute. With mixer off, add the 2 cups flour. Beat on low speed until flour is incorporated. Increase speed to medium, mix until ingredients form an even, cohesive dough.
Break dough into small chunks and distribute in prepared pan; with your fingers press dough into an even layer. Bake 20 minutes or until dough has begun to puff and is just set. Cool on wire rack 5 minutes.
Lightly brush exposed sides of foil with softened butter to keep filling from sticking. Spread jam evenly over crust.
Sprinkle evenly with blackberries.
With a lemon zester, remove peel from lemon, making sure to avoid bitter white pith.
In a large bowl beat cream cheese and goat cheese with an electric mixer on medium to high speed for 30 seconds. Mix in granulated sugar and 1 tablespoon flour until blended. With mixer running, add egg, egg yolk, lemon zest, lemon juice, and vanilla. Beat until smooth.
Pour custard batter evenly over berries. Tilt pan back and forth to distribute evenly. Bake at 350 degrees F for 25 to 30 minutes or until barely set. Transfer to a wire rack until completely cool, about 1 hour; cover and transfer to refrigerator. Chill 2 hours. Top will crack slightly as it cools.
Use foil to lift the bars from pan. With a knife or metal spatula, support the sides of the bars while you gently peel the foil downward and away from sides of the bars.
Cut into long bars, peel foil from bottom, and transfer to cutting boars using side of a long knife or spatula. Cut into 24 squares

Friday, June 17, 2011

Peach and Blackberry Custard Tart


We have enjoyed all the fresh peaches at the farmers market the last few weekends and they are always giving out samples (which Audrey loves).  I've gotten several just to eat and decided to bake something with them this past week.  I have also been buying lots of blueberries and blackberries and thought the flavor and color contrast would be nice.


This tart was adapted from a recipe published recently in Martha Stewart Living for Peach-Custard Pie.  I chose to make it a more dainty tart and add the blackberries and I quite like my variation. The instructions for peeling the peaches was amazing and I thought the "naked" peaches were so pretty.  You scored them, boiled them for a minute and then placed them in an ice water bath before peeling.


What's not to like about custard?


I started putting the blackberries just in the center and ended up placing them around the entire tart so everyone would have a bit of blackberries. 


Add a huge dollop of fresh whipped cream and it's complete!

Jam Tarts


Jam tarts are one of the easiest treats to make and the absolute best use of leftover pastry. I made the peach and blackberry tart and made several of these with the extra pastry trimmings after making the tart crust.


Just combine your leftover pastry, roll it out and cut out several pieces of pastry with a large fluted biscuit cutter.  I have a special jam tart pan from England, but you could also make them as mini tarts, or place the pastry in the bottom of a muffin tin.


Grease the pan with Pam or butter, place the pastry rounds in the pan and fill them with a teaspoon of nice jam or preserves. I usually used homemade grape or strawberry jam, but haven't made any since I moved, so I settled for some nice organic jam from the market.  I bake them for around 10 minutes at 375 degrees or until the jam is bubbly and the pastry starts to brown slightly.

They are amazing warm from the oven with a cold glass of milk or a teatime treat!

Friday, June 10, 2011

Lemon Ricotta Pancakes with Cherry Sauce


Our weekday mornings can be a little rushed sometimes, so I really love to take our time on the weekend to make a nice breakfast. I've made several varieties of pancakes - buttermilk, buckwheat, corn meal, with blueberries, pumpkin, apples, pears, etc.  I really wanted to make some with ricotta cheese though. I had some extra cherries on hand and thought this sounded like a great combination for a summer pancake breakfast.

I think the cherry pitter is the best invention, especially when you're cooking/baking with fresh cherries.


I've usually only used ricotta cheese to make lasagna, but it's going in pancakes this time.


The lemon peel smelled amazing and adds such a nice bright color and taste to the pancake batter.


I think they turned out great and little A agreed after gobbling down a few.  The pancakes were a nice light and fluffy texture and the cherry sauce provided a great balance of flavor with the cherries and lemon.


Recipe for Lemon Ricotta Pancakes with Cherry Sauce
Adapted from recipes in Bon Appetit and Gourmet


Ingredients:

Pancakes:
4 large eggs, separated
1 1/3 C. ricotta cheese
1 1/2 T.sugar
1 1/2 T. freshly grated lemon zest
1/2 C. all-purpose flour
melted butter for brushing the griddle

Cherry Sauce:
1/2 C. (or more) water, divided
2 t.cornstarch
1 T. unsalted butter
2 cups halved pitted fresh Bing cherries or other dark sweet cherries (about 14 ounces unpitted cherries)
2 T. (packed) golden brown sugar
1 T. fresh lemon juice

Directions:

Pancakes:
In a bowl whisk together the egg yolks, ricotta, sugar, and lemon zest, add the flour and stir the mixture until it is just combined. In a bowl with an electric mixer, beat the egg whites with a pinch of salt until they hold stiff peaks, whisk about one fourth of them into the ricotta mixture, and fold in the remaining whites gently but thoroughly. Heat a griddle over moderately high heat until it is hot enough to make drops of water scatter over its surface and brush it with some of the melted butter. Working in batches, pour the batter onto the griddle by 1/4-cup measures and cook the pancakes for 1 to 2 minutes on each side, or until they are golden, brushing the griddle with some of the melted butter as necessary. Transfer the pancakes as they are cooked to a heatproof platter and keep them warm in a preheated 200°F. oven.
Sauce:
Whisk 1/4 cup water and cornstarch in small bowl. Melt butter in medium nonstick skillet over medium heat. Add cherries, 1/4 cup water, and brown sugar; stir until sugar dissolves. Increase heat to medium-high; add cornstarch mixture and stir until mixture boils and thickens, adding water by tablespoonfuls if sauce is very thick, about 1 minute. Remove from heat; stir in lemon juice.