Friday, November 12, 2010

Pumpkin Cupcakes


These pumpkin cupcakes were actually the other flavor that my friend wanted for her daughter's christening.  I've been wanting to do something this autumn with marzipan and thought the little pumpkins would be cute.  This is an idea I've seen a few places and is in the Martha Stewart Cupcakes book. I used that recipe for the pumpkin cupcakes, but did my marzipan pumpkins a little different, primarily as I don't have a leaf cutter that is that small.  I made cream cheese frosting to go with the pumpkin cupcake, but I made a triple recipe to be able to frost a few dozen cupcakes.  I have some leftover that I'll freeze to use later - maybe for red velvet cake for the holidays.

I reconstituted my marzipan with corn syrup after it thawed.  At first I thought I'd need to scratch it, but it ended up coming together after a lot of kneading.  I used Americolor Electric Orange and Leaf Green to color the marzipan for the pumpkin decorations.


They turned out nice and bright! I could've gone easier on the green. 

I don't have a tiny leaf cookie cutter, so I used this cutter and then snipped it into smaller pieces to use as the stem.

I rolled out the orange and cut it into pieces to have enough to put on all the cupcakes.

I rolled the orange pieces into little balls and set them aside on parchment paper so they wouldn't stick to the counter.


When I put them all together, I dipped the stem in a tiny bit of corn syrup to help it stick. Then I used a toothpick to put ridges on the sides of the pumpkins.


I love them - how cute!  I didn't take the time to carve a pumpkin this year, but I made my own!


A pumpkin patch of cupcakes...


Christening Cupcakes


A friend of mine asked me to make some cupcakes for her daughter's christening this weekend.  I was very honored, of course, and took the challenge on.  I really don't do a lot of baking for order and mainly just bake for fun, family gatherings or to try something new.  So, I have to admit I was a bit nervous to make sure I created something that was special enough and tasted amazing too.  We talked through flavors and decorations and while she thought chocolate would be good, she left it to me to come up with colors and decorations for her. 

I was thinking of doing some fondant or marzipan cut outs in white on a colored buttercream, but I had difficulty finding small fondant cutters in the shape that I was looking for - crosses and doves.  However, at my baking supply store, they do have candy making supplies and I found these great chocolate molds. While it was a little tedious, it was quite easy to do and I love how they turned out.  I melted down my white chocolate pieces in a glass measuring cup in the microwave, poured it into the molds, tapped them to get the bubbles out and let them set for around 10 minutes in the freezer.  Just like the lady at the store said, they popped right out after I took the trays out of the freezer. I made chocolates!


I tried a different chocolate cupcake recipe for these.  I used the Devil's Food Cupcake recipe from my Martha Stewart's Cupcakes book.  I LOVE this recipe compared to others I've tried.  The cake is much more dense and moist and has a nice rich flavor (yes, I had to sample one!).  I made a simple vanilla buttercream frosting with the white chocolate decorations. 


I was so happy I remembered to get a few cupcake bakery boxes to transport them in.  Plus, it makes them seem professional when they're packaged nicely. 

I really like the color of these.  They remind me of the Wedgewood jasperware pottery that I have a small collection of. I hope she likes them!

Friday, November 5, 2010

Meringue Nests with Blackberries and Cream


Aren't these blackberries gorgeous?  They were on sale at the market and while I used some of them in the apple-blackberry crisp I made last weekend, I still had some to use.  My mum came to visit again and I thought I'd try something special for dessert one evening.  We made crispy, airy, sweet meringue nests with these luscious blackberries and fresh whipped cream.  I guess this is sort of a version of a pavlova, but mini ones. I think pavlovas are typically one large meringue cake with cream and fruit. These are individual little nests made of meringue.  I guess I just like the idea of a nest anyway...it makes everything sound cozy.

The meringue is very easy to make.  I've made it before, but this was my first attempt at nests. I whipped the egg whites, sugar and some vanilla and got this thick glossy meringue.


I spooned these heaping mounds of meringue on the Silpat.  The original recipe called for eight nests and I didn't seem to have room, so I had five pretty large nests.


Then, I took the back of a spoon to hollow out the center (with still leaving a layer in the nest) and smoothed the edges a bit. 

Here they are ready to bake. I know many people pipe them onto the baking sheet, but I sort liked the homemade swirled look to mine.


After two hours of baking at just over 200 degrees, they were all ready and peeled right off the Silpat.  I washed the berries and let them dry so that they wouldn't make wet pools in the meringue nests when I put them together.


Our evening treat was ready with a bunch of berries nestled in the meringue and topped with a big dollop of whipped cream.  It's a very simple dessert that would be easy to prep ahead of time and use with all kinds of fruits.  The flavors were uncomplicated, yet fresh and sophisticated.


Recipe for Meringue Nests


Ingredients:
3 egg whites
175 g/6 oz caster (superfine) sugar
A few drops of vanilla essence (extract)

Lay a Silpat or piece of parchment on a baking (cookie) sheet. Whisk the egg whites until stiff. Add 1 tbsp of the sugar and the vanilla and whisk again until stiff and glossy. Gradually whisk in half the remaining sugar, then fold in the remainder with a metal spoon. Spoon five to eight round heaps of the mixture a little apart on the baking sheet and hollow out slightly in the centers to form nests. Rough up the mixture slightly round the tops. Bake in a preheated oven at 225°F for 2-3 hours or until crisp but still white. Remove from the oven and leave to cool. Carefully lift off the paper and store in an airtight container.

Wash the fruit to fill them in advance and dry in a bowl with paper towel.

For the whipped cream, use 1 cup of heavy whipping cream with a tablespoon of caster sugar and whip on high until thick and creamy.

Monday, November 1, 2010

Caramel Apple Cookie Pops


I've made this caramel apple cookie recipe before and just made the regular cookies. I took them to the neighborhood Halloween party last year and they got rave reviews.  While I knew it was an amazing recipe, I wanted to do something different this time around, especially since I was planning to take them to the same party again this year. Since they are inspired by caramel apples, I thought...why not add sticks to them like caramel apples?  Plus, it would make it fun for people to eat at the party. I haven't made cookie pops before, but I knew it was a nice thick cake-like batter that would probably work.  They are yummy too!  They're made with fresh shredded apple and with the caramel icing, they taste just like the real caramel apples.  Except they're better...and not as messy!

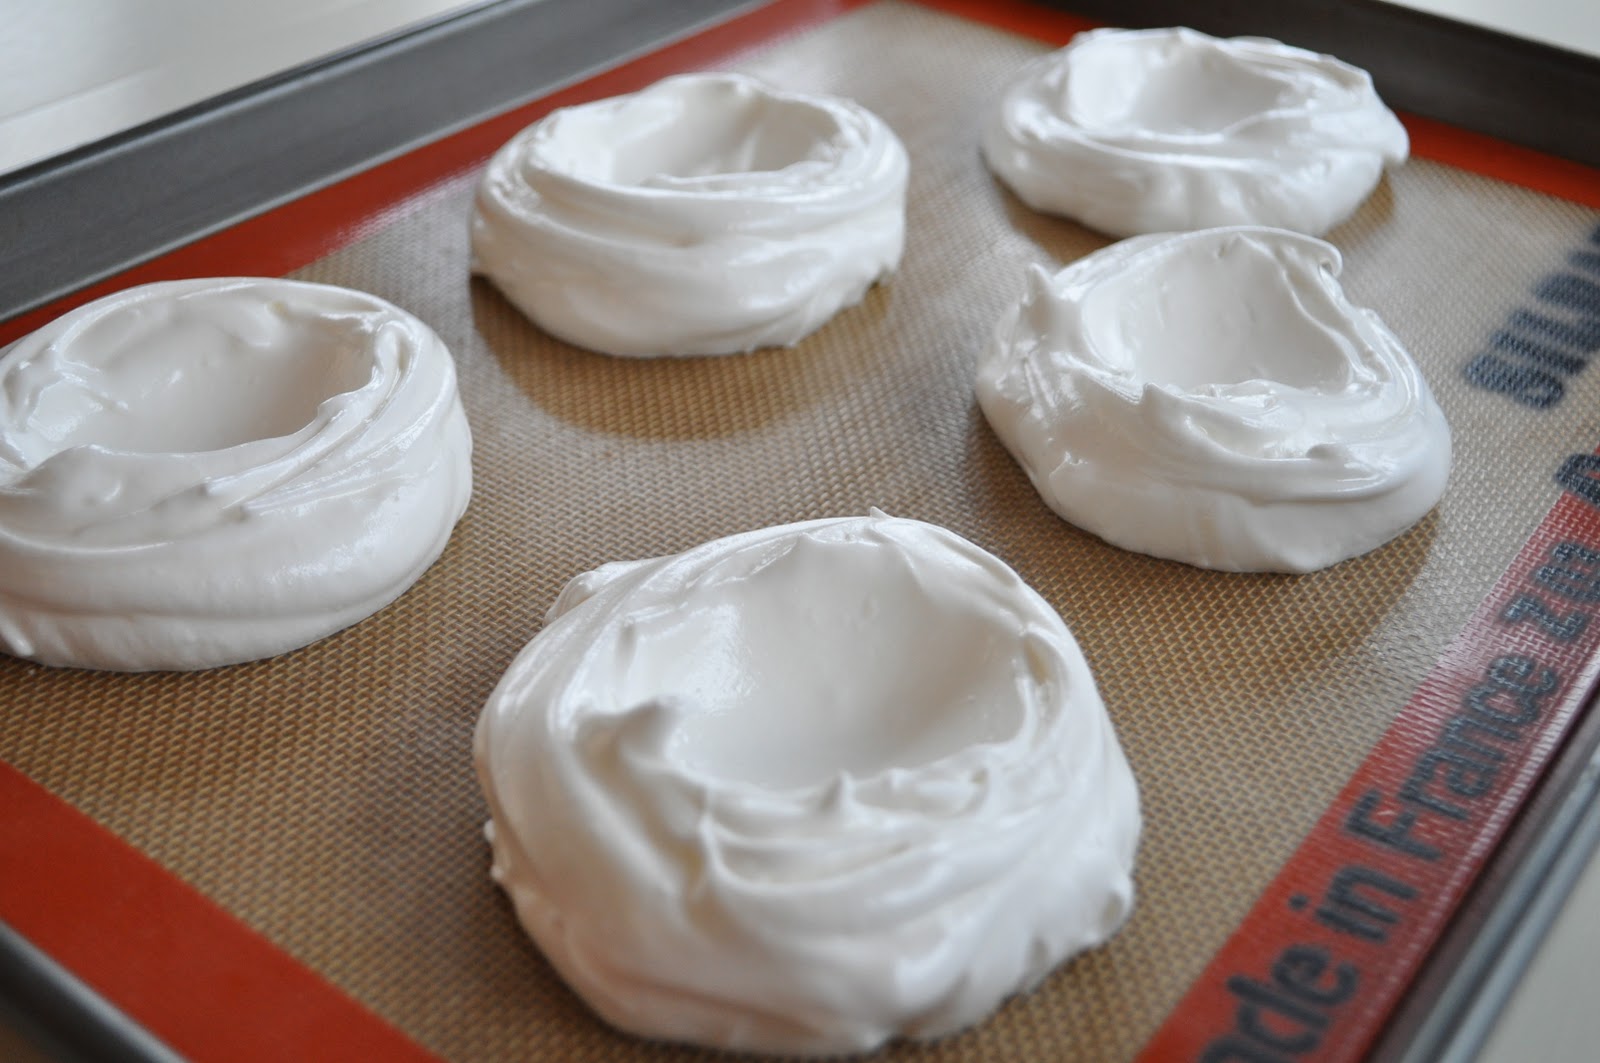
I made the dough, put scoops on the Silpat, placed the lollipop stick through the center and flattened each cookie scoop with the back of a spoon to get more of a round shape and set it into the stick.
I let them cool on a pan a little after baking and carefully transferred them with a spatula to some parchment paper to cool and set.

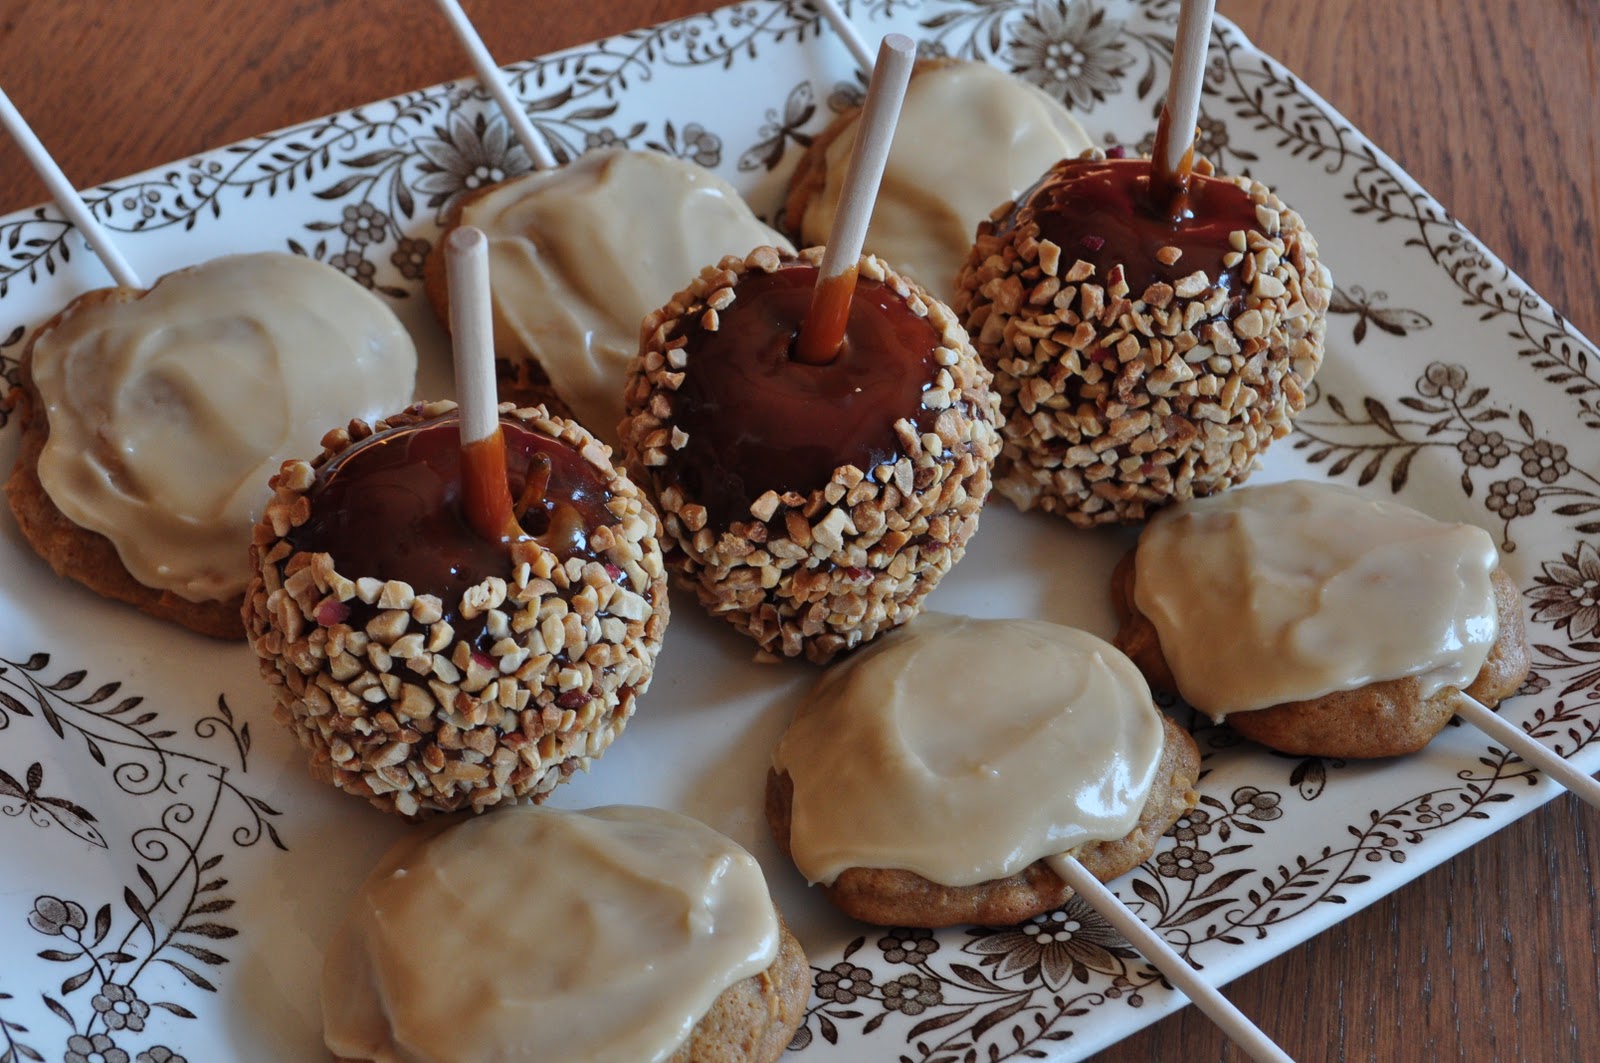
The caramel apple icing was carefully applied so as to not pull on the stick too much and voila!....caramel apple cookie pops! The original recipe called for adding nuts like the apples I have here, but I was taking them where there would be lots of kids so I thought I better not chance it with possible allergies. They were a hit again and gone before I left the party early!
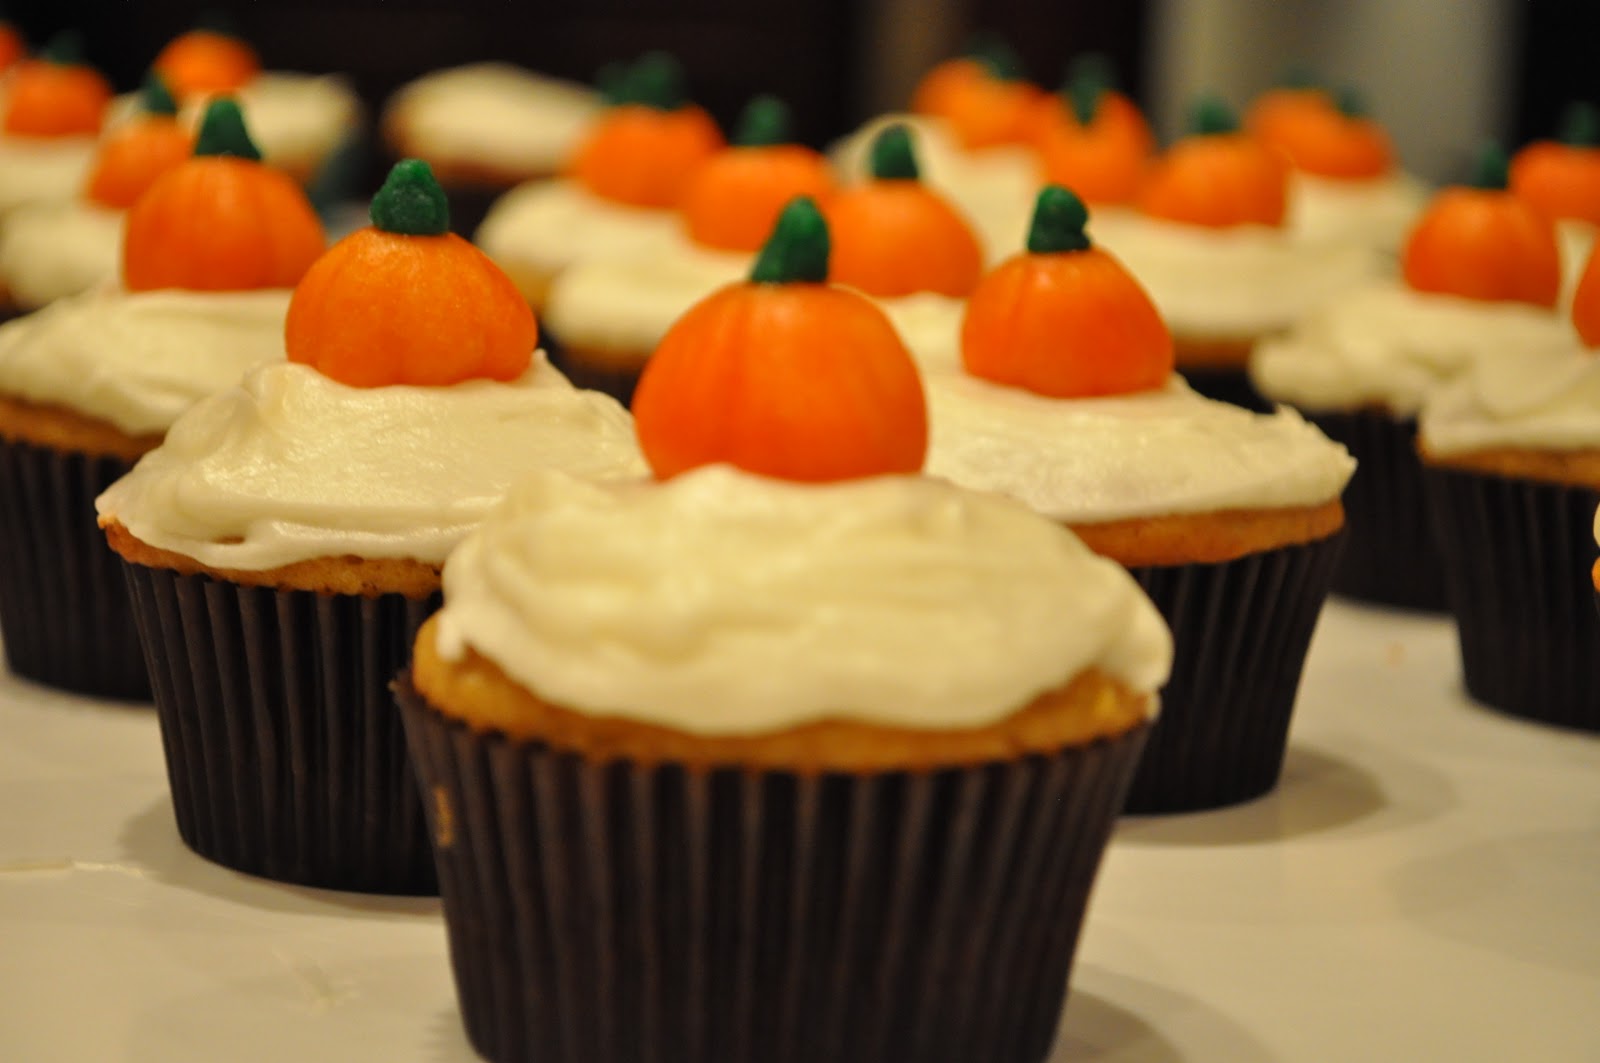
My sister and her family came to the party with us and she made these yummy and adorable spice sandwich cookies with homemade jack-o-lantern faces.  We used some cream cheese frosting that we colored orange to put in between and also used some of the leftover caramel apple icing for some. 

She even made some pretty oak leaves.  The pumpkin faces were the best to see the icing through and it oozed out through the eyes when you took a bite! :)
  
Recipe for Caramel Apple Cookie Pops
 (Adapted from a recipe for Caramel Apple Cookies in Midwest Living Magazine) 

Ingredients:

Cookie dough:
  • 1/2 cup unsalted butter, softened
  • 1 1/2 cups packed brown sugar
  • 1 tsp. baking soda
  • 1 t. pumpkin or apple pie spice
  • 1/4 tsp. salt
  • 1 egg
  • 1/2 cup apple juice
  • 2 1/4 cups all-purpose flour
  • 1/4 cup whole wheat flour
  • 1 large tart apple (peeled, cored and coarsely shredded)
Icing:
  • 1/2 cup packed brown sugar
  • 3 Tbs. unsalted butter
  • 3 Tbs. apple juice
  • 2 2/3 cups powdered sugar
Chopped nuts (optional)

Directions:
In a large mixing bowl, beat 1/2 cup butter with an electric mixer on medium to high speed for 30 seconds.  Add 1 1/4 cups brown sugar, baking soda, pie spice, and salt. Beat until well-combined, scraping sides of bowl. Beat in egg until well-combined. Add 1/2 cup apple juice; beat on low speed until combined (don't worry if mixture looks a little curdled). Beat in the flours and fold in the shredded apple.

Drop dough by slightly rounded teaspoons 2 inches apart onto a greased or Silpat lined cookie sheet. Be careful not to make them too big if you're making cookie pops so they won't fall off the sticks if they're too heavy.  If you are doing pops, stagger the scoops on the cookie sheet and place the sticks into the center of the rounded teaspoon.  Run a spoon under warm water and flatten each of the cookie scoops slightly with the back of the spoon.  Bake at 350 degrees about 10-12 minutes or until tops and edges are browned.  Let stand for a few minutes to cool and transfer carefully to parchment paper or wire racks for icing.

For icing: In a small saucepan, heat and stir 1/2 cup brown sugar, butter and apple juice over medium heat until all the sugar dissolves. Remove from heat and whisk in the powdered sugar.  If it is too thick, you can add a touch more juice or if it's too runny add a little more powdered sugar.  If you let it sit too long, it will thicken and you may need to add some juice to get it back to spreading consistency.  Spread carefully on top of cookies and sprinkle with chopped nuts, if desired.