Showing posts with label piping. Show all posts

Friday, August 6, 2010

Summer Sugar Cookies


I've always typically reserved making sugar cookies for Christmastime.  However, I received some adorable ice cream cone and lollipop cookie cutters for my birthday in July and just had to try them.  I also have wanted to try being more fancy with decorating cookies and so here is my first attempt at that. It was fun with a little frustration mixed in and just took a lot longer than I thought it would.

I used the Martha Stewart sugar cookie recipe and as suggested, I shaped them into discs, wrapped them in plastic and I ended up chilling them overnight.  This whole process actually took me three days (evenings). One evening I made the dough, the next day I cut them and baked them and the next I made the icing and decorated them.

The cookie cutters had little indents for the details and weren't the easiest to cut out (I used lots of flour).  I put them on the silpat lined baking sheets and chilled them for about 10 minutes in the freezer.  I've skipped this step in the past, but I know it does help them to keep their shape when you bake them.

Here are the baked sugar cookies.  They were so pretty at this point with their detail.  Such innocent little sugar cookies that weren't yet globbed with icing.  They tasted pretty good just like this too, especially since I made them nice and thick.

Speaking of thick...my royal icing was thick.  I always grew up making the simple and syrupy royal icing with just powdered sugar and milk.  I probably just added way too much milk than necessary. This time, since I wanted to pipe detail on the cookies, I used the royal icing recipe from the Bake at 350 blog. This royal icing has meringue powder and corn syrup in it, which I'm assuming helps it hold its own for piping. She had great descriptive directions, but I think I may have overbeat it or something as it was quite thick.  It ended up working out, but when I piped the border on my cookies some of them started to crack...like meringue.

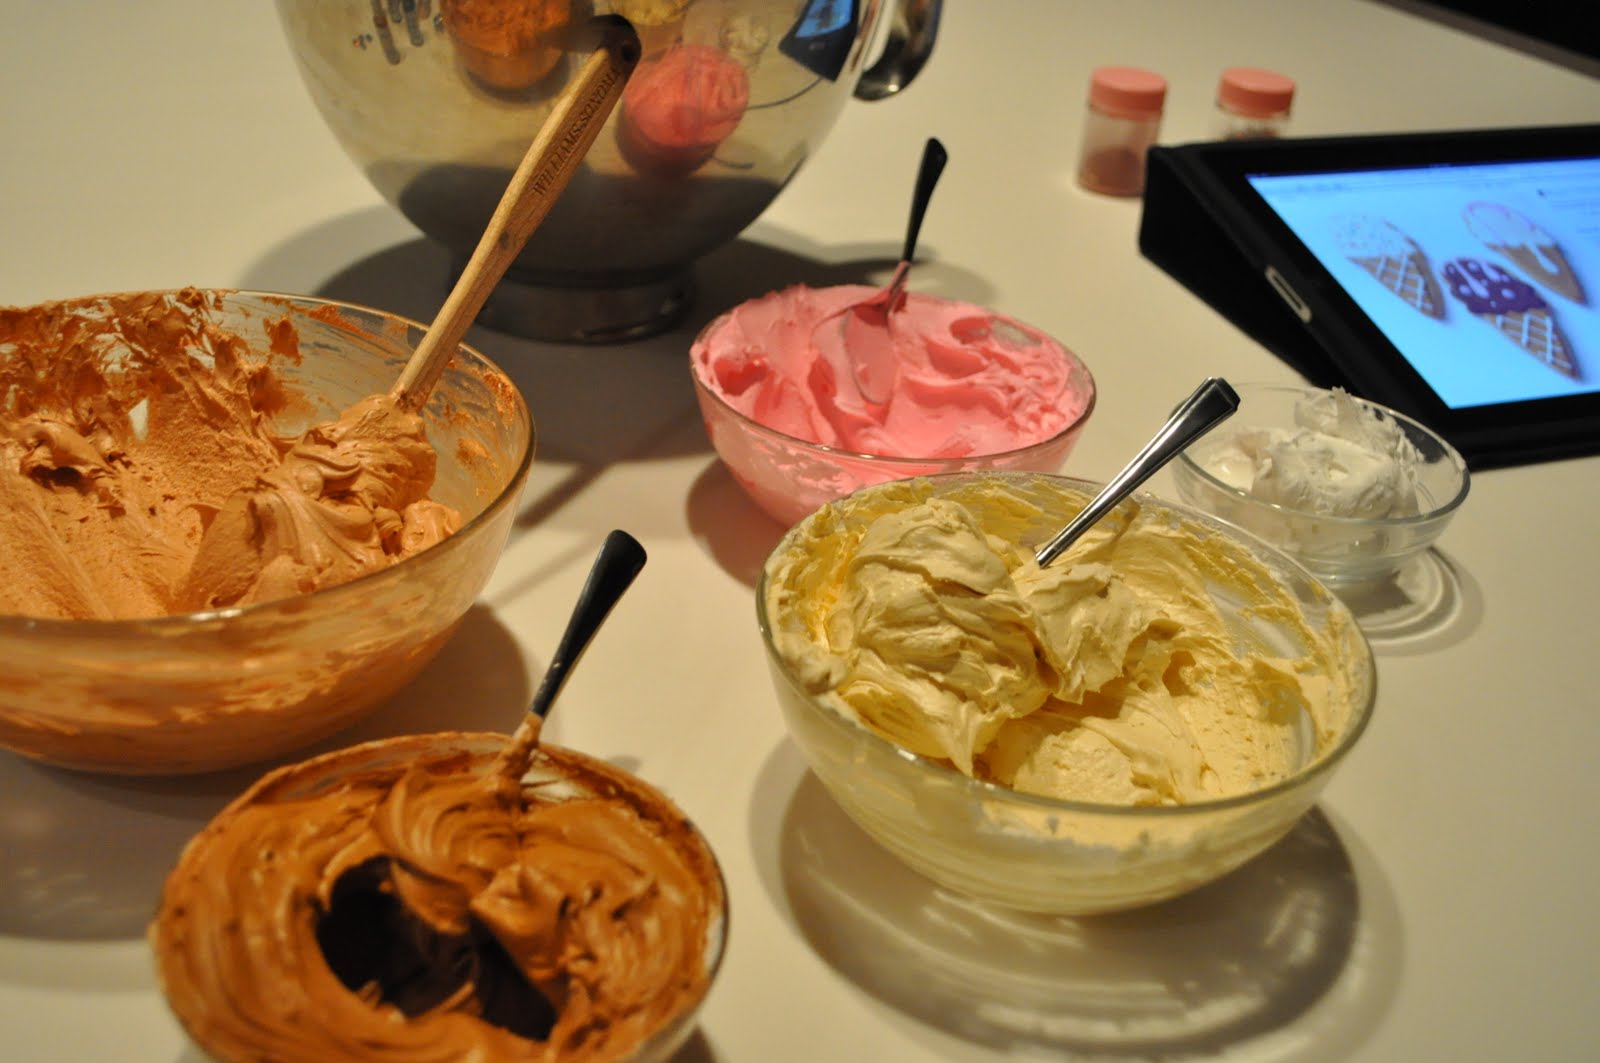
I got myself all set up...bowls of icing to make different colors, spoons and spatulas to stir, cookies lined up on sheets of parchment, food coloring and my iPad with some sites that had ice cream cookie decorating inspiration.

My icing was finally all colored to my satisfaction. I used AmeriColor Ivory for the vanilla ice cream, Americolor Warm Brown and Copper for the ice cream cone, AmeriColor Warm Brown for the chocolate ice cream and AmeriColor dusty pink for the pink dots and drips.

I found these squeeze bottles at Crate & Barrel and they are so handy for pushing through all the icing in the bottle and are easy to hold onto.  I used these for piping on the edging. I also have a few plain tall squeeze bottles that I used for the flood icing (to fill in the middle of the cookies).

The first step was to to outline the edges of the cookies with each color and then I thinned out each of the colors and filled them in.  At this point I realized that I had a) picked a rather difficult shape for my cookie decorating trial; b) baked way too many and I was determined to decorate them all and c) I was tired, but just had to finish the project as this was the third evening I was working on this.

I did just some plain sprinkles on some of them after I filled in the ice cream.

When I used the pink icing, I started doing some dots and cherry drips on top.  I also used the leftover ivory to make a "waffle" pattern on the cone. If you may have noticed, I don't have any photos of finished lollipops.  I did decorate the sticks with the same icing I used for the cones and then I did yellow lollipops with a pink swirl.  However, the swirl looked like more of a sloppy smear, so I chose not to share those, aside from my belly.

I definitely learned a lot and I think I'll try this again...maybe at Christmastime. I don't think I'm going to try to tackle Santa though. I'll plan to stick with stars, snowmen and Christmas trees.


Thursday, May 20, 2010

Sweets in Cincy


On my recent visit to Cincinnati to visit my sister, I had the time to take a side trip to O'Bryonville to the Bonbonerie Bakery. This is where I had my sister's bridal shower and I don't know that I had been back there since then. They have since added a cafe and I was interested in checking them out again.

The old tearoom was closed since they have the new cafe and we spent most of our time perusing the bakery cases and all the pretty treats.
Audrey had fun looking at all the pretty cookies and cupcakes and gravitated towards the brightly colored frosted sugar cookies.
Their displays are so pretty!


They had a lot of sample cake designs. They do gorgeous (and very delicious wedding cakes) and this is actually where my sister got her wedding cake.
They had a pretty outdoor seating area, so we ordered a sampling of pastries, got a latte and enjoyed our treats. We also got a loaf of brioche to go and made amazing brioche french toast the next morning!
The real reason we were visiting for the weekend was my niece's 2nd birthday. My sister also loves to bake and made some vanilla cupcakes for the birthday girl. She had some chocolate buttercream to use and made some vanilla buttercream, so we had some fun piping together. I had some Dora decorations to put on a few since she loves Dora. The others we piped with swirls and topped with a purple flower (although the purple was darker than I had originally intended). We used the same flower tip to pipe the chocolate buttercream and it turned out nicely.
Here are the ones with the pretty bright white buttercream and purple flowers.
The chocolate buttercream was made with real chocolate (not just cocoa) and was SO good (Audrey coco approved!). It was the first time I've tried the big flower tip and it was quite easy.

Thursday, February 25, 2010

Hot Cross Buns

Hot cross buns always remind me of lent and while I've had them before from a grocery store or bakery, I've never baked them myself. They are a sweet bun with spices and the dough smells similar to cinnamon rolls. They are typically made during lent and eaten particularly on Good Friday with the cross on top symbolizing the crucifixion. So, given the time of year, this was my challenge this past week and it was definitely more challenging than I thought for as simple as they seem to be. They require yeast for leavening and you just need to be patient and go through the steps. However, they were very fun to make and the outcome was hearty and delicious.

With using yeast for the leavening (to allow the dough to rise), it does require a hot liquid to be added to activate the yeast. I heated a cup of milk to 110 degrees and added in with the yeast and other ingredients. Once all the ingredients to the dough were mixed together, it needs to sit to allow enough time for it to rise. This time allows the yeast to emit enough carbon dioxide to allow it to rise. Here is my dough before and after rising - it worked!


After rising, I kneeded the dough a little and then measured out 24 (somewhat) equal pieces. I used the help of my kitchen scale to make sure they were pretty close with each being around 2 oz. so I didn't have different sized buns when I baked them.


Now it was time to place my 24 pieces of dough in the baking dish and wait yet again. The dough is to sit for another hour or so to rise before baking. Here are my individual buns rolled out into balls and then after rising. Yeah - it worked again!


Before baking, I traced the cross on top of each bun with a sharp knife to guide where the icing should be and brushed on an egg wash for a little glisten. They were to bake until golden brown on top and then I let them cool before taking them apart (I resisted temptation) and they broke apart perfectly. I mixed together a simple icing and chose to pipe the crosses on top. They were worth the wait and were great with a cup of tea. I'd take 40 days of these buns!


Sunday, January 31, 2010

Meringue Hearts


~~~~~~~~~~~~~~~~~~~~
I've made meringue to top a lemon pie, but have never made baked meringues. These meringue hearts were made as a decoration to top our chocolate tart (see next post), but were a sweet treat on their own and turned out very pretty. They are quite easy to make and only take three ingredients - egg whites, sugar and cream of tartar. The time is in piping and baking them. They need to bake at a very low temperature for a few hours and then stay in the oven overnight. So, you won't want to make them if you have a lot of other baking to follow. I made them a day in advance of the tart as they keep well. You have to make sure to whip the meringue to stiff peaks (a mixer is essential) and I separated the meringue into three bowls to make white, pink and red hearts. The prettiest ones where when the colors were mixed a little when I switched colors while piping. They are such a sweet Valentine decoration and looked so nice on top of the chocolate tart.