Showing posts with label yeast. Show all posts

Saturday, May 29, 2010

Buttery Brioche


I've always liked the flavor and look of brioche and love brioche french toast. I even just like the word and "brioche" is just such fun to say. It's said to be one of the most difficult breads to make and while it takes a while for the dough to rise and it's more work to shape the different loaves, it's not too difficult. I happened to have some of the pretty fluted molds that I've never used, so along with a guide from Fine Cooking magazine and a little time on my hands, I tackled brioche.

It is a very buttery bread with a 1/2 pound of butter. What seemed like a greasy mess while I was mixing it turned out to be a beautiful smooth and elastic dough.


After mixing all the ingredients together in the mixer, you had to knead and fold it a few times before forming it into a perfect ball to prepare it for rising.


First I let it rise at room temperature in a bowl for about an hour.


Then, I put it in the refrigerator to rise overnight, which the guide indicated would provide the best flavor.


While I let the dough come to room temperature the next day, I buttered the pretty brioche molds.
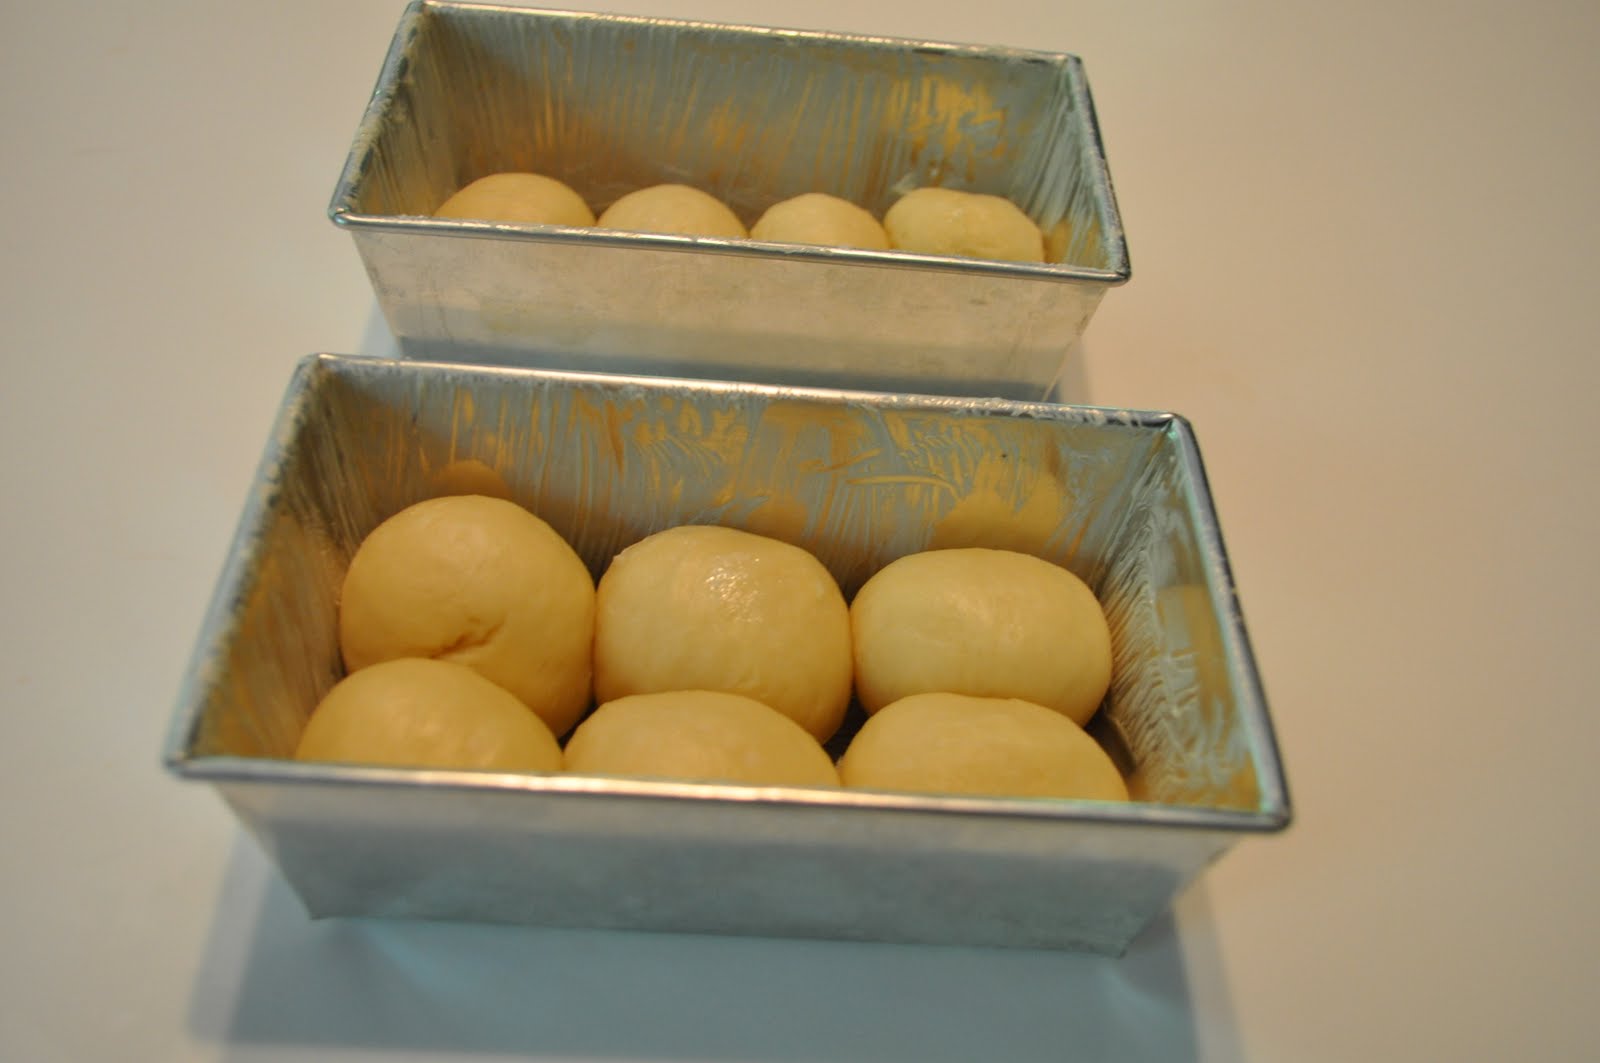
When the dough was warm, I cut the dough into sixteen (almost) equal pieces and weighed them out to try to get them as consistent in size as possible.
I first formed the dough for the small brioche tins to make brioche rolls, but I only had three of these molds. They weren't perfect, but I thought they looked quite pretty for my first try.


I then rolled out the other pieces for the large brioche mold.


I still had some dough, so I made a few little loaves as well.

Now that they were all together, it was time for them to rise again for about an hour.

After they had their final rising, I brushed on an egg wash and they were ready to bake. They only needed to bake for about 20 minutes and turned out a lovely golden brown.
We enjoyed the rolls for breakfast with jam and Audrey was calling them "cupcakes."

The loaves turned out nice as well and I made french toast for breakfast another morning. I think I'll use the large brioche mold for dinner parties for a pretty arrangement of dinner rolls that people can pluck off. This was well worth the time and has multiple uses. It would be great in a bread pudding or to use for stuffing as well.

Tuesday, March 9, 2010

Beignets


I think I had first heard of beignets when I lived in Chicago and tried them at this restaurant downtown that would make them to order for dessert. We didn't make it out for lunch often, but when we did there were plenty of great restaurants to choose from and I remember sharing a plate of fresh hot beignets with my colleagues. I wanted to try to make these myself, but did a little research first to see what the fuss was about. Beignet, pronounced "ban-yay," is the french word for "fried dough" It's basically a fancy doughnut, but without a hole in it (which is much easier to make too). However, while they have French orgins, they have gained popularity in the U.S. The famous Cafe Du Monde in New Orleans is known for them and they are actually the state doughnut of Louisiana.

I've come to realize on recent travels that doughnut desserts at high-end restaurants are quite popular now and people love them served hot....what comfort food! So, with the other packet of active dry yeast I had after making hot cross buns, I tackled this popular dessert this past weekend.


They are made with a yeast pastry, which was really only sweetened with a little sugar and some freshly ground nutmeg. With the use of yeast, this again requires patience and waiting. My before and after photos of the pastry don't look like a dramatic amount of rising happened, but it did rise a bit and was ready for kneading.


I kneaded the dough a little, rolled it out to the right thickness and cut out my rounds to place on a floured cookie sheet. I had to let it rise again and this time I could really tell they had risen and the rounds were touching each other. I think I'd use a larger cookie sheet next time as the dough was quite sticky and it wasn't so great that they were stuck together when I was ready to fry them. Now onto frying...


I'm not a huge fan for fried foods, but these are fried in Safflower oil and cooked quickly (just a minute or so per side) at a high temperature (approx. 350 degrees) so they cook but do not absorb a lot of oil. I used the candy thermometer and kept it in the pan the entire time so I could monitor the temperature of the oil. After frying, they went on a paper towel lined plate and were ready for the final touches.


I covered them in powdered sugar and created a huge mound of sugary beignets. I made sure to have family around to help clean up this tower of sugary doughnuts and they loved them. I think I could have even used a smaller round cookie cutter to make more smaller beignets, but we had no problem trying more than one. They are really good on their own or served with dipping sauces, like a chocolate sauce, raspberry or strawberry. We enjoyed them with some homemade triple chocolate ice cream that my brother made (yes, we're a family of cooks!).

Thursday, February 25, 2010

Hot Cross Buns

Hot cross buns always remind me of lent and while I've had them before from a grocery store or bakery, I've never baked them myself. They are a sweet bun with spices and the dough smells similar to cinnamon rolls. They are typically made during lent and eaten particularly on Good Friday with the cross on top symbolizing the crucifixion. So, given the time of year, this was my challenge this past week and it was definitely more challenging than I thought for as simple as they seem to be. They require yeast for leavening and you just need to be patient and go through the steps. However, they were very fun to make and the outcome was hearty and delicious.

With using yeast for the leavening (to allow the dough to rise), it does require a hot liquid to be added to activate the yeast. I heated a cup of milk to 110 degrees and added in with the yeast and other ingredients. Once all the ingredients to the dough were mixed together, it needs to sit to allow enough time for it to rise. This time allows the yeast to emit enough carbon dioxide to allow it to rise. Here is my dough before and after rising - it worked!


After rising, I kneeded the dough a little and then measured out 24 (somewhat) equal pieces. I used the help of my kitchen scale to make sure they were pretty close with each being around 2 oz. so I didn't have different sized buns when I baked them.


Now it was time to place my 24 pieces of dough in the baking dish and wait yet again. The dough is to sit for another hour or so to rise before baking. Here are my individual buns rolled out into balls and then after rising. Yeah - it worked again!


Before baking, I traced the cross on top of each bun with a sharp knife to guide where the icing should be and brushed on an egg wash for a little glisten. They were to bake until golden brown on top and then I let them cool before taking them apart (I resisted temptation) and they broke apart perfectly. I mixed together a simple icing and chose to pipe the crosses on top. They were worth the wait and were great with a cup of tea. I'd take 40 days of these buns!